Learn the knotless knot for tying hooks, the grinner for swivels and leads, the figure-of-eight loop for loops in braid, and the uni-to-uni or double grinner for joining two lines. Wet every knot before you tighten it and test it with a firm pull.
Five knots, almost every job
You don't need a book of knots to fish for carp. Five cover nearly everything: tying hooks, tying swivels and leads, making loops, and joining one line to another. Learn these well and practise them at home until you can tie them without looking.
| Knot | Use it for |
|---|---|
| Knotless knot | Tying the hook and forming the hair in one go |
| Grinner (or palomar) | Swivels, lead clips, rig rings |
| Figure-of-eight loop | Loops in braid and coated braid |
| Uni-to-uni | Joining mainline to a leader |
| Double grinner | Joining two lines of similar thickness |
Items required
- The line or hooklink you are tying, plus hooks and swivels to practise on.
- Braid scissors: ordinary scissors fray braid.
- A knot puller or rig puller, so you can pull knots tight without cutting your fingers.
- Water or saliva to wet every knot.
1. Knotless knot
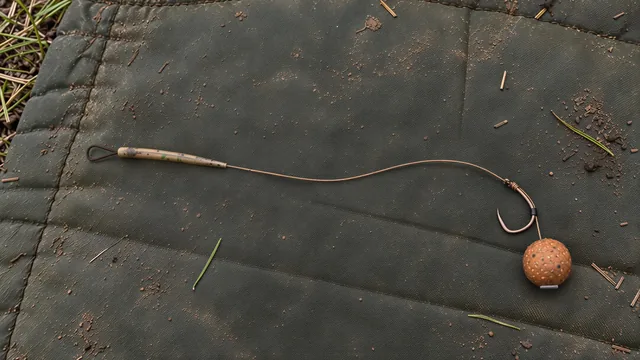
The standard hook knot for a hair rig. It forms the hair and fixes the hook at the same time.
- Tie a small loop in the end of the hooklink and thread on your bait with a stop.
- Pass the other end through the back of the hook eye, from the point side.
- Set the bait 3 to 5 mm from the bend, holding the hair against the shank.
- Whip the line 7 to 10 times down the shank towards the bend, trapping the hair.
- Pass the end back through the eye from the point side and pull it tight.
2. Grinner (uni) knot
Strong, quick, and works with mono, fluorocarbon and coated hooklinks. The palomar is a good alternative for braid.
- Pass about 15 cm of line through the swivel eye.
- Lay the tag end back alongside the main line to form a loop.
- Wrap the tag end round both lines, inside the loop, 5 or 6 times.
- Wet the turns and pull the tag end so they bed down neatly.
- Slide the knot down to the swivel by pulling the main line, then tighten firmly and trim to 2 to 3 mm.
3. Figure-of-eight loop
The neatest, strongest loop for braid, and the easiest one to tie in coated braid.
- Double the end of the line over to make a loop the size you want.
- Take the doubled line round behind itself once.
- Pass the loop end back through the first turn from the front, making a figure eight.
- Wet it, hold the loop and pull the main line and tag apart to tighten.
4. Uni-to-uni
Joins mainline to a leader or shock leader. It is really two grinner knots tied round each other's lines.
- Overlap the two line ends by about 20 cm.
- Tie a grinner with the end of the first line round the second, with 5 or 6 turns.
- Tie a grinner with the end of the second line round the first.
- Wet both knots and pull each one snug.
- Pull the two main lines apart so the knots slide together, then trim both tags.
5. Double grinner
Very similar to the uni-to-uni, and the traditional choice for joining two lines of a similar thickness.
- Lay the two ends side by side, pointing in opposite directions, overlapping by 20 cm.
- With one end, make a loop and take 4 to 6 turns round both lines inside it.
- Repeat on the other side with the second end.
- Wet both and tighten each, then pull the main lines so the knots meet.
- Trim the tags close, leaving 2 to 3 mm.
For a thick shock leader joined to a thin mainline, a dedicated leader knot such as the Albright slips through the rod rings more easily. Whatever join you use, tie it so the knot sits on the reel spool when you cast, not in the rod rings.
Testing every knot
Pull every knot hard on a knot puller before it goes in the water. A good knot is neat, the turns sit side by side, and the line next to it isn't curly or flattened. If anything looks wrong, cut it off and tie it again. A new knot takes a minute; a lost fish can take a whole season to find again.
Never burn the tag of a knot that is already tight, because the heat can weaken it. Check knots after every fish and every snag, and retie any that look worn. A failed knot can leave a hook or rig in a fish.
Questions
What is the strongest knot for tying a swivel?
The grinner (also called the uni knot) and the palomar are both very strong when tied well. The grinner is easier with thick or coated hooklinks, and the palomar suits braid. Five or six turns is enough for most lines.
Why do I need to wet a knot?
Pulling a dry knot tight creates friction heat, which can weaken monofilament and fluorocarbon. Wetting it with water or saliva lets the turns bed down smoothly.
Which knot joins a shock leader to mainline?
A uni-to-uni or double grinner works well for most leaders. For a very thick shock leader to a thin mainline, many anglers use a dedicated leader knot such as the Albright, which passes better through the rod rings.
How do I know a knot is good?
Pull it hard against a fixed point, such as a swivel on a rig puller. Look for neat, tight turns without crossing. If the line looks curly or kinked by the knot, cut it off and tie it again.
Should I trim the tag end close?
Leave about 2 to 3 mm. Cutting flush can let the knot creep loose, especially in fluorocarbon. Never burn the tag end of a knot you have already tightened, because the heat can damage it.